

How to Add and Arrange Content on the Timeline
After generating your videos in the Canvas, you can add them to the editing timeline and arrange them into the sequence you want. Your selected clips, along with their built-in audio when available, will appear on the timeline, where you can move and organize your content and use snapping options for more precise positioning.


Practice each step from this guide directly in Filmora.TV.
How to Add Videos to the Timeline
-
Step 1 Add Video to Timeline
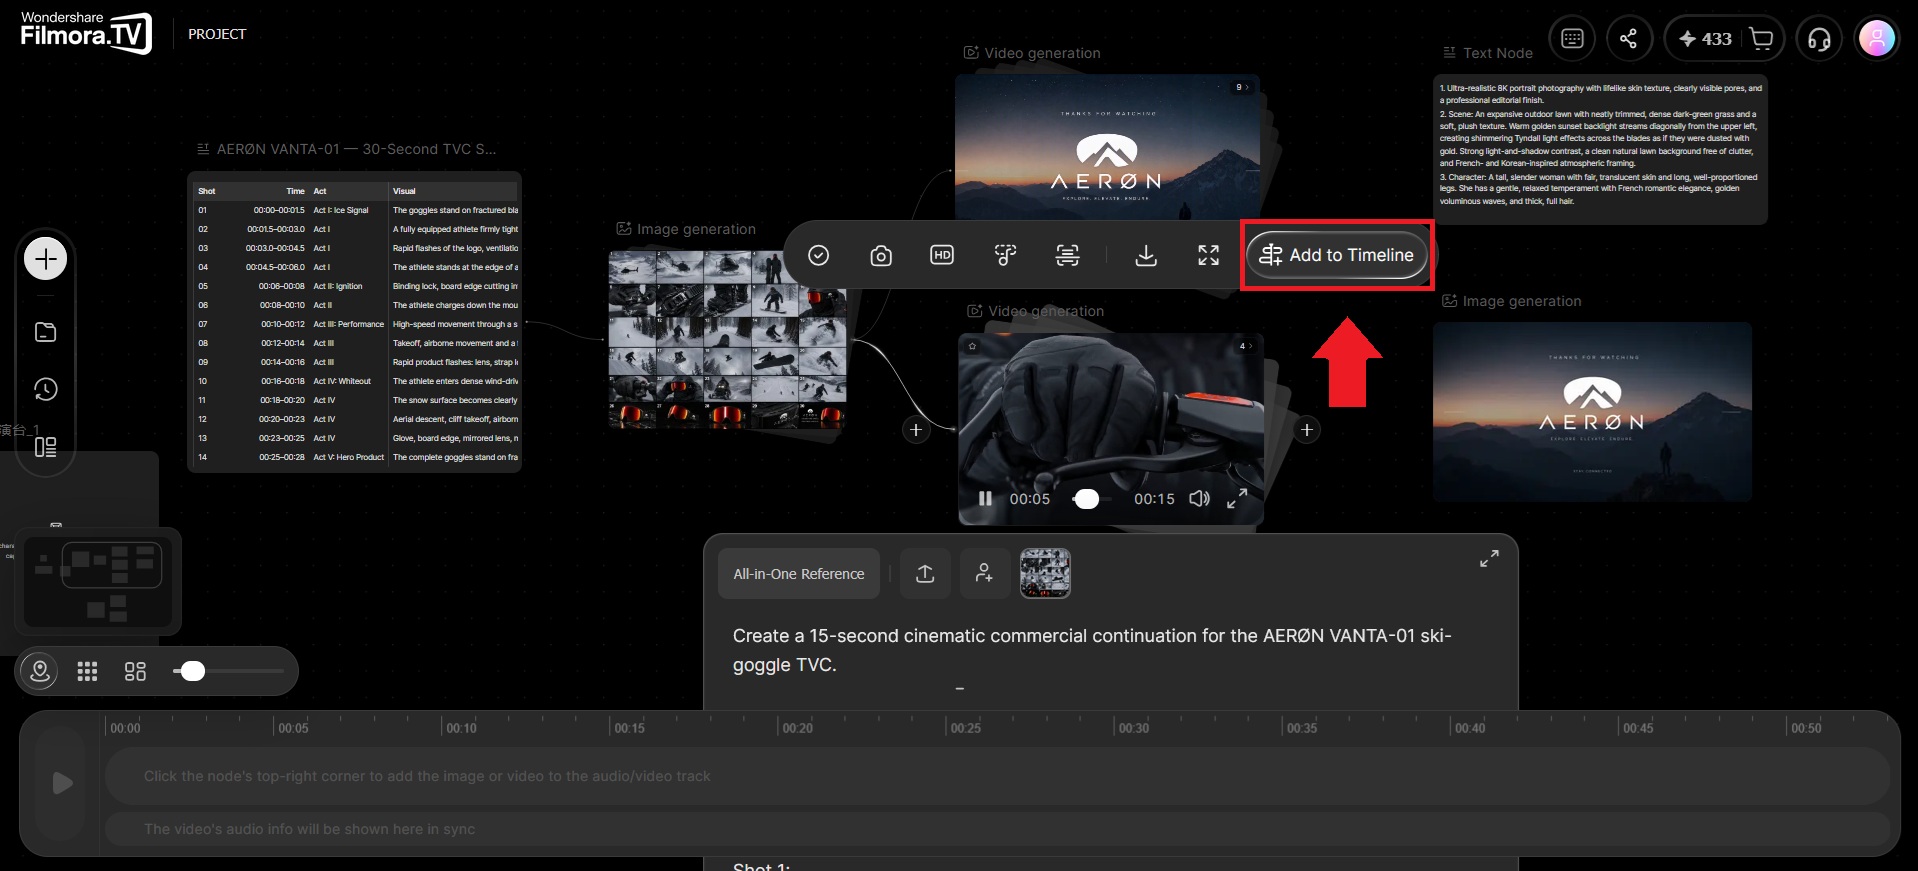
After you've created the videos you want to use, you can move them from the canvas to the timeline for refinement. Select the clip you want to edit and click "Add to Timeline."
-
Step 2 Select an Editing Action
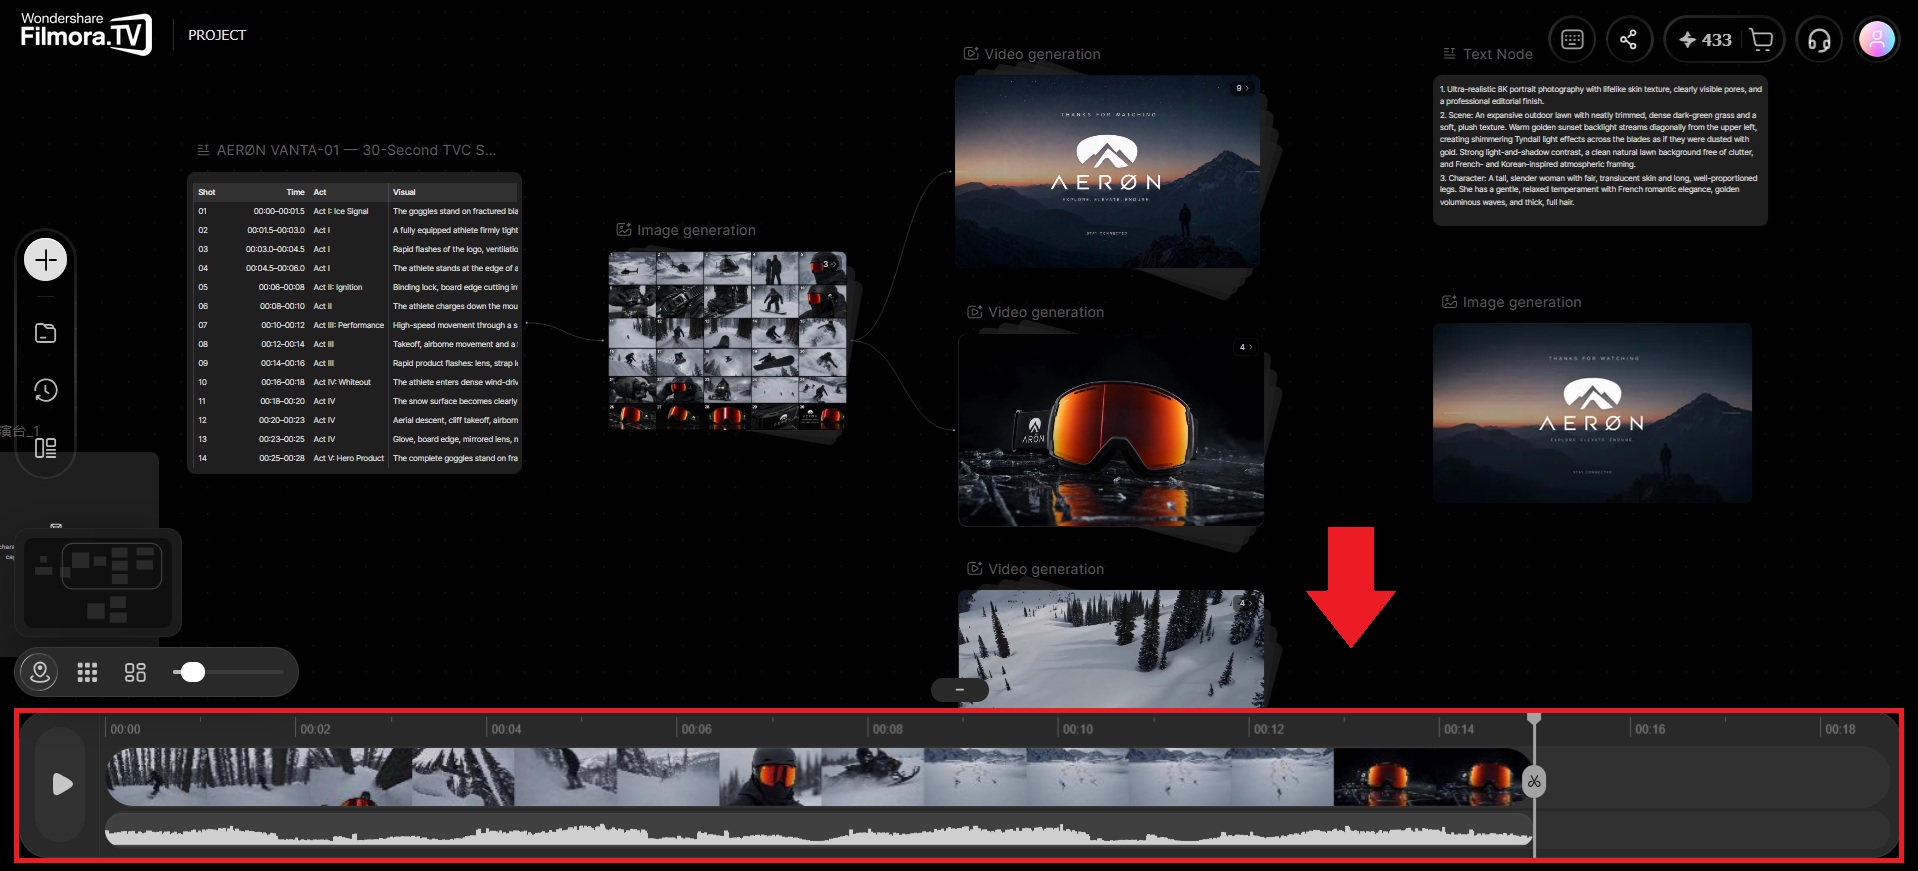
Your selected video(s) and their built-in audio will appear on the timeline below. From there, you can access different editing menus and tools to refine the clips.
How to Arrange Content on the Timeline
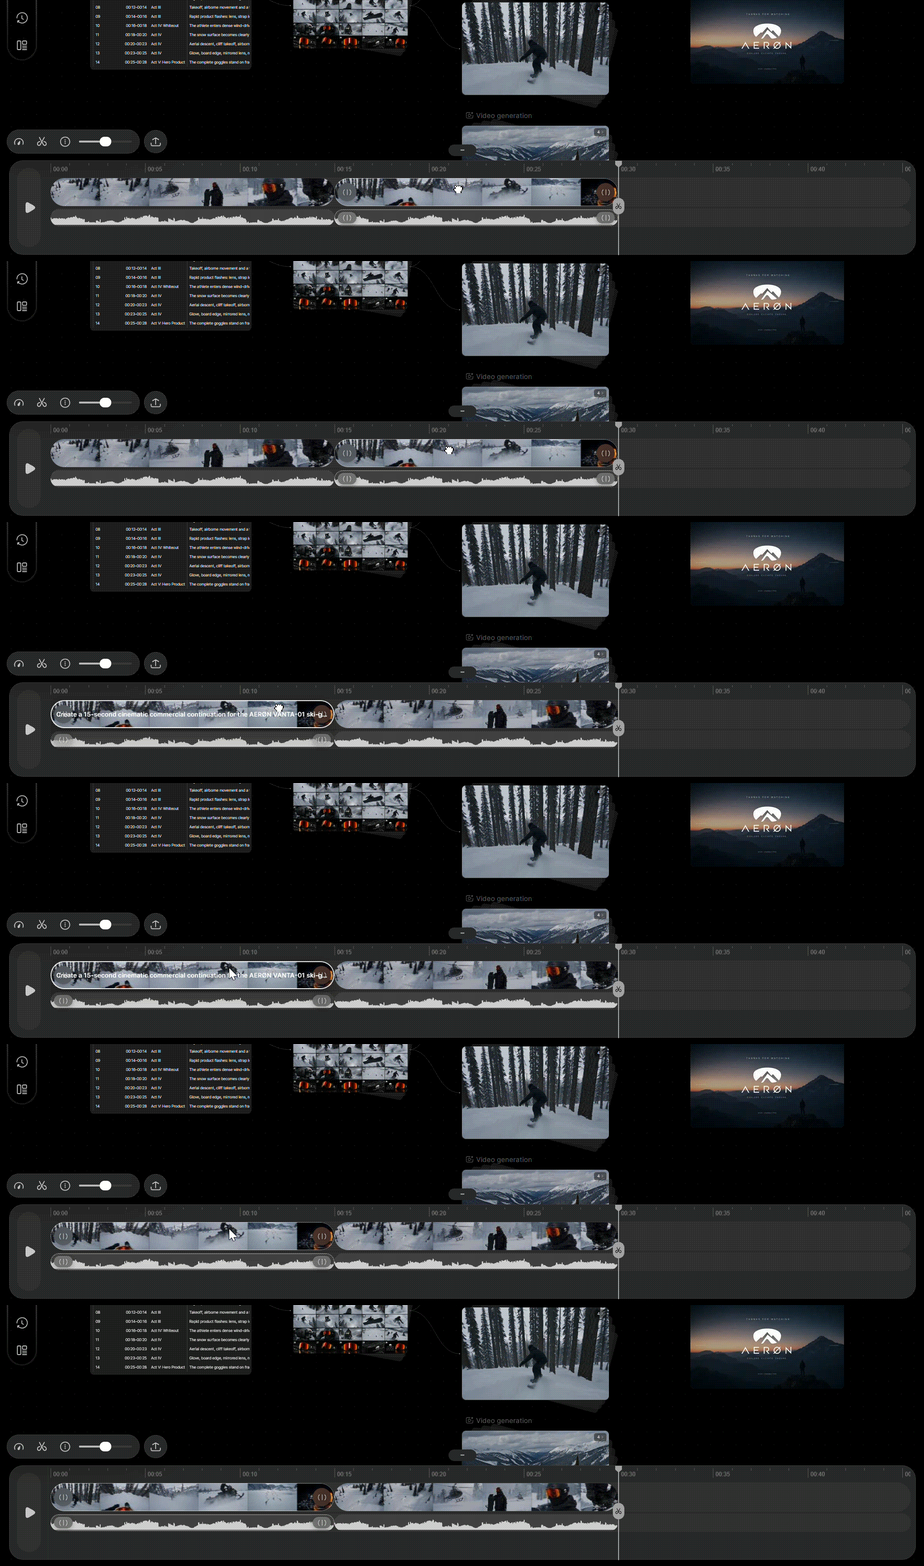
To arrange and change the order of your content, click and hold the clip, image, or audio on the timeline, then drag it to the position where you want it.
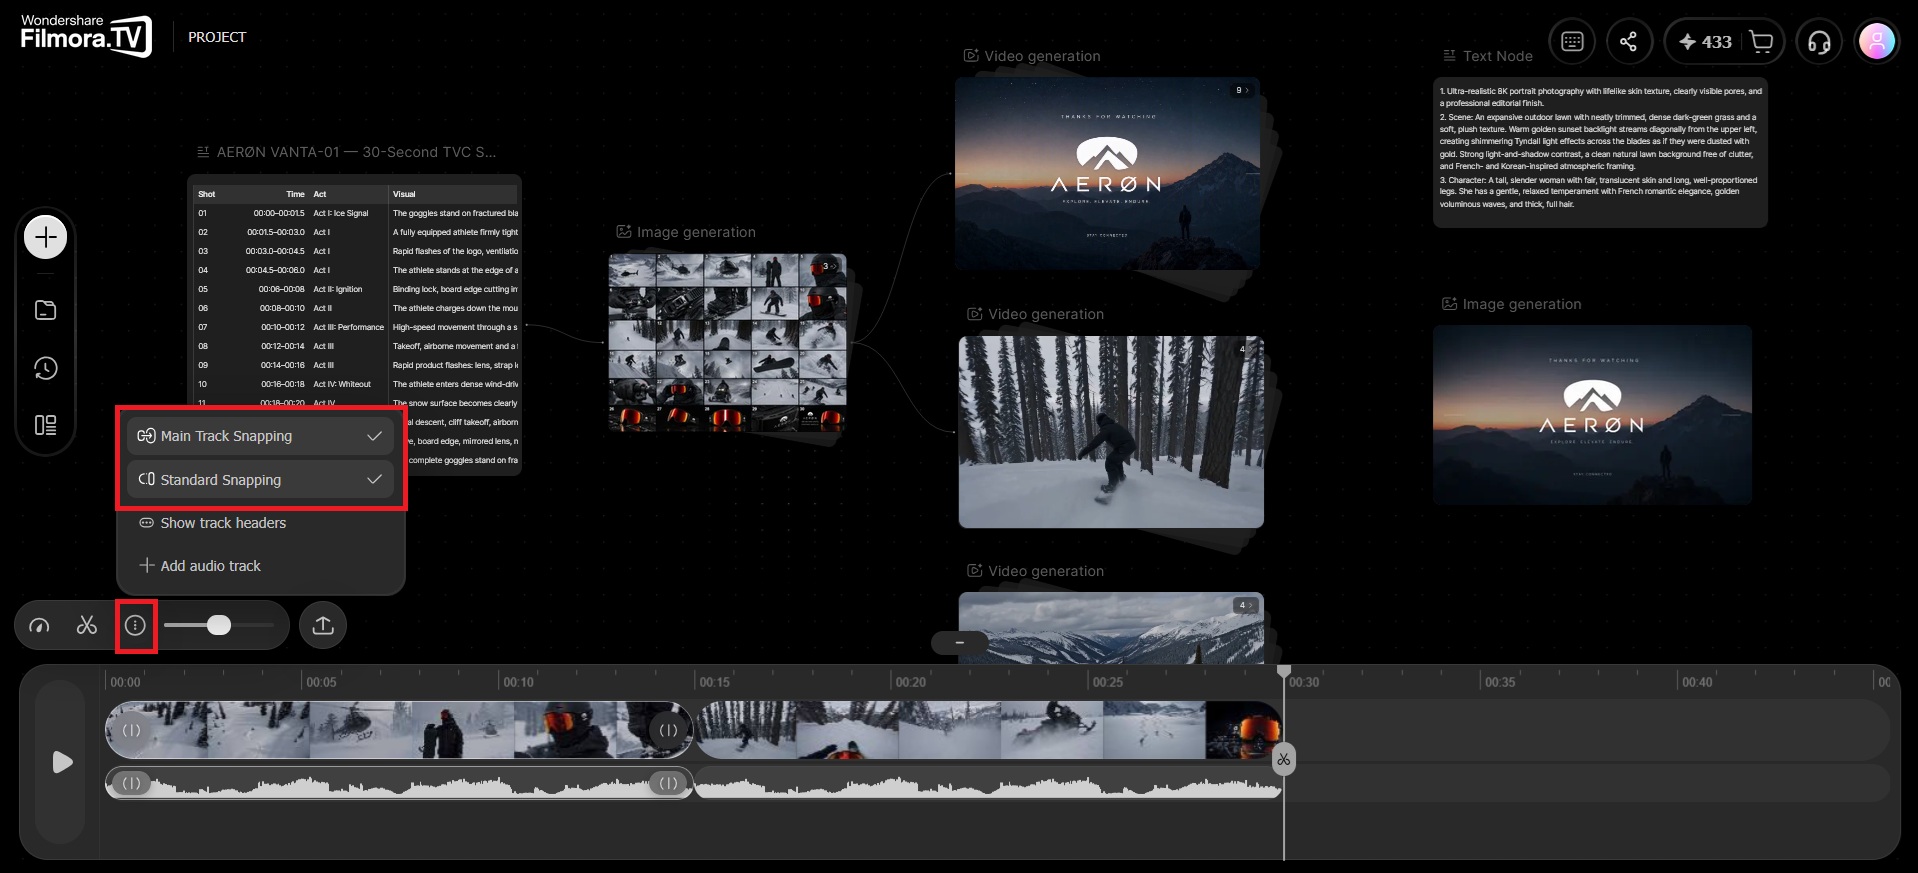
Filmora.TV also provides snapping options to help you position clips more precisely:
- Main Track Snapping: Helps align clips with other clips on the main track as you arrange your sequence.
- Standard Snapping: Helps snap clips into place as you move them along the timeline.
FAQ
-
What basic editing adjustments does the timeline support?
The timeline supports basic preview and rough-cut editing, including playhead positioning, clip splitting, reordering, speed changes, audio adjustments, and copy and paste. If the video contains audio, the audio will also appear as a waveform on the audio track in the timeline.
Was this guide helpful?