

How to Manage Audio on the Timeline
Along with your video clips, you can manage audio directly on the timeline to refine the sound of your video. Filmora.TV gives you control over your clips' audio, whether that means pulling it out, adding new tracks, or adjusting the volume levels.

Try Filmora.TV

AI Creative Studio
Follow Along in Your Workspace
Practice each step from this guide directly in Filmora.TV.
In this article
Extract Audio
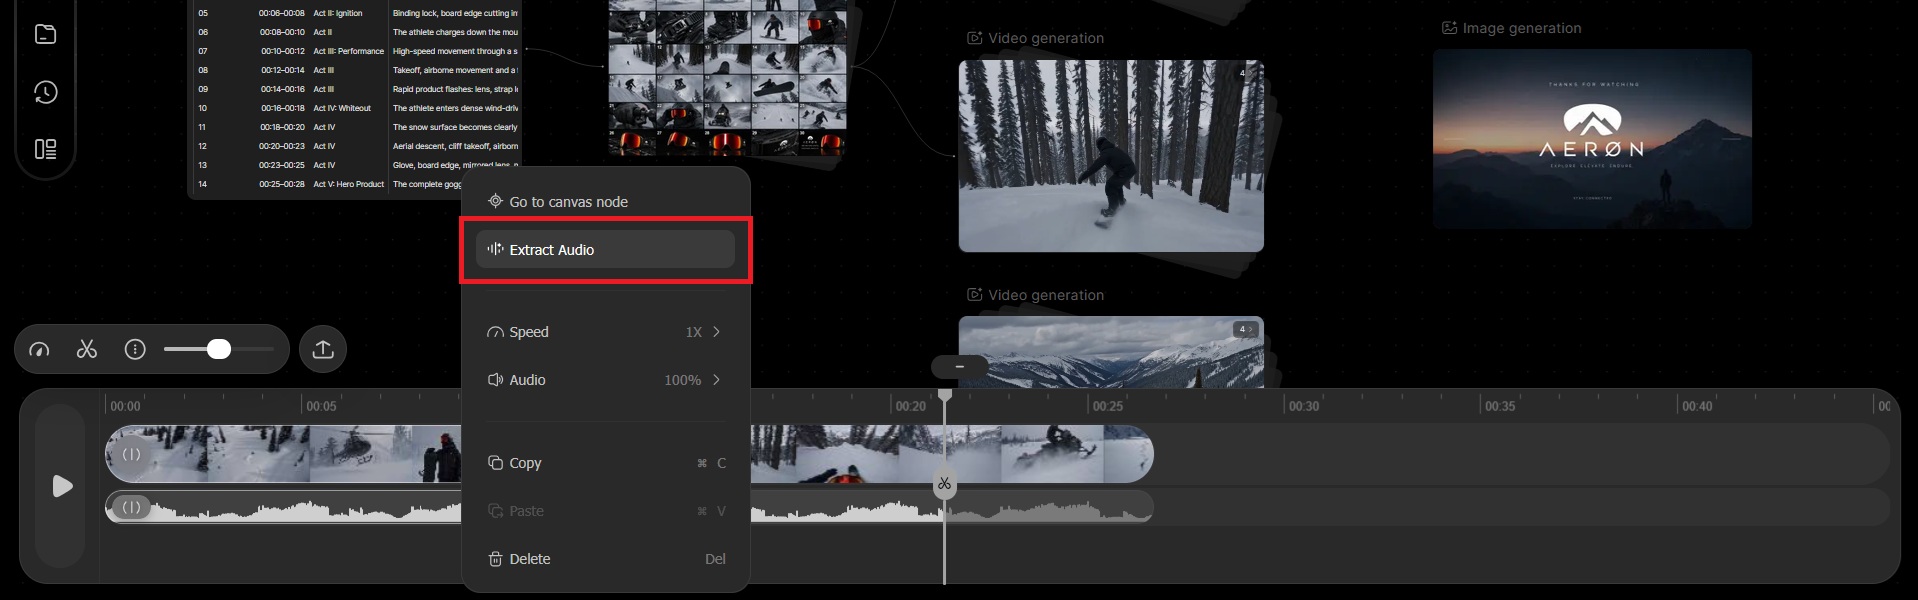
To separate the existing audio from a video clip, right-click the clip and select "Extract Audio."
Add Audio
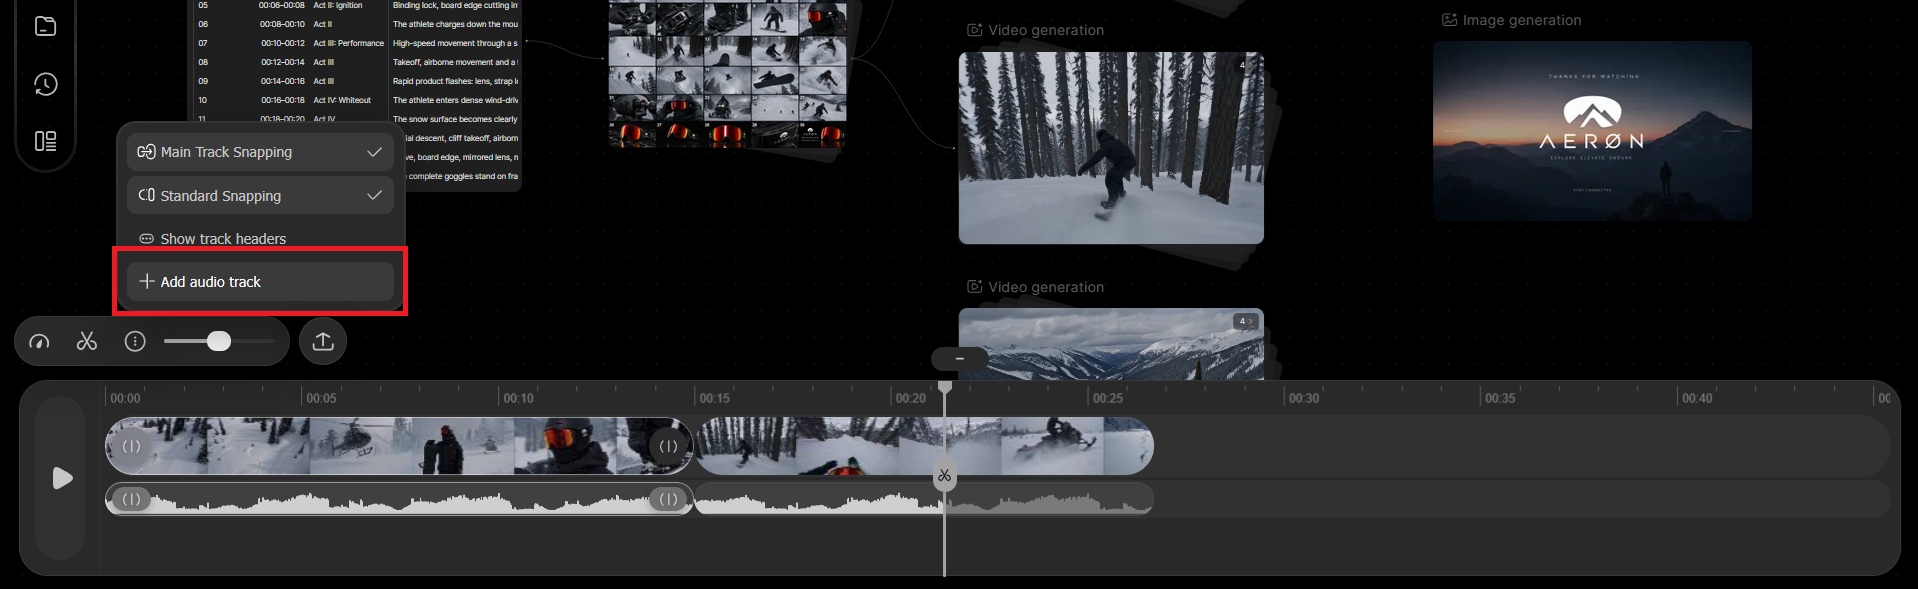
To add another audio file, click the three-dot menu, select "Add Audio," and upload an audio file from your folder.
Adjust Volume
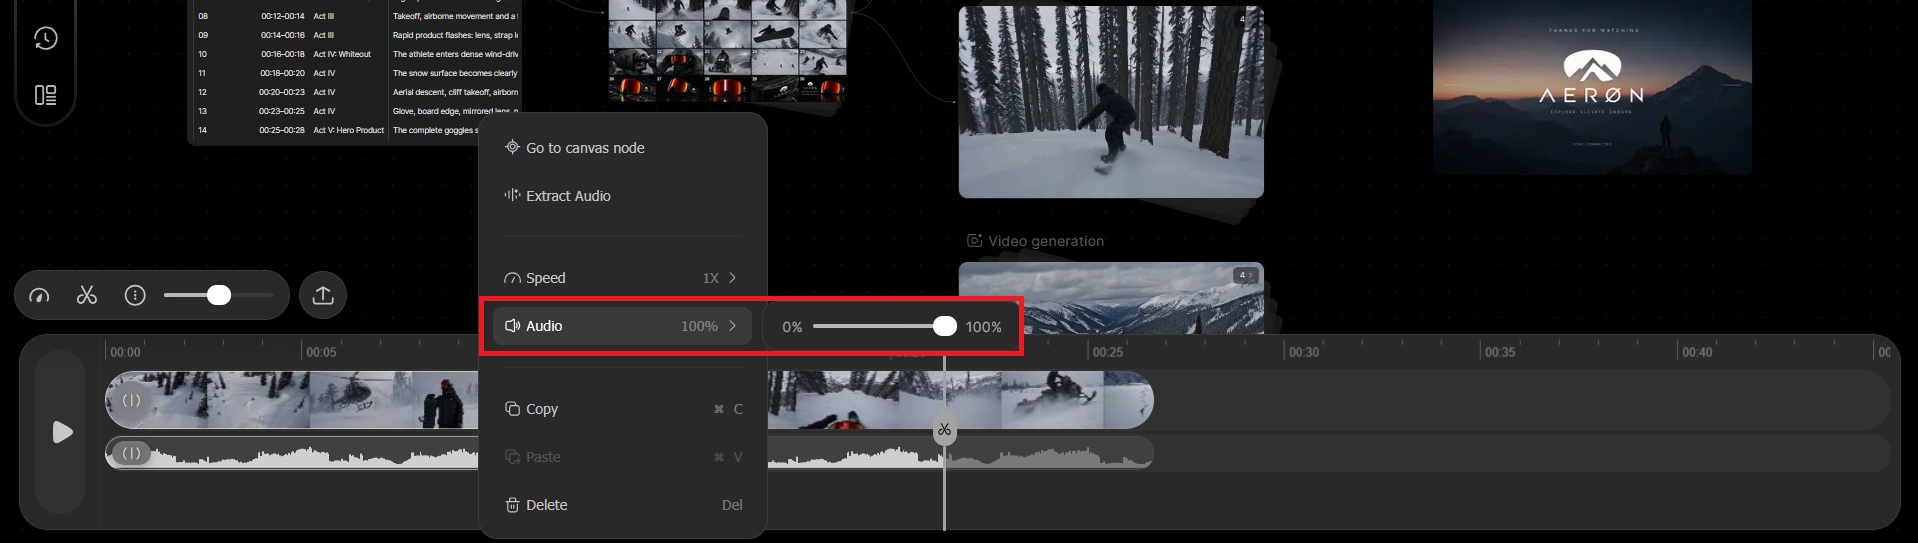
If you need to make the audio quieter or louder, you can adjust the volume by right-clicking the audio track. Then, select "Audio" and adjust the volume slider to your preferred level.
FAQs
-
1. Can audio in a video be processed separately?
Yes. Filmora.TV supports audio-video separation, so you can extract the audio track from a video or perform vocal separation. The separated audio can be used for further audio editing, background music replacement, or other creative work. -
2. What basic editing adjustments does the timeline support?
The timeline supports basic preview and rough-cut editing, including playhead positioning, clip splitting, reordering, speed changes, audio adjustments, and copy and paste. If the video contains audio, the audio will also appear as a waveform on the audio track in the timeline.
Was this guide helpful?