
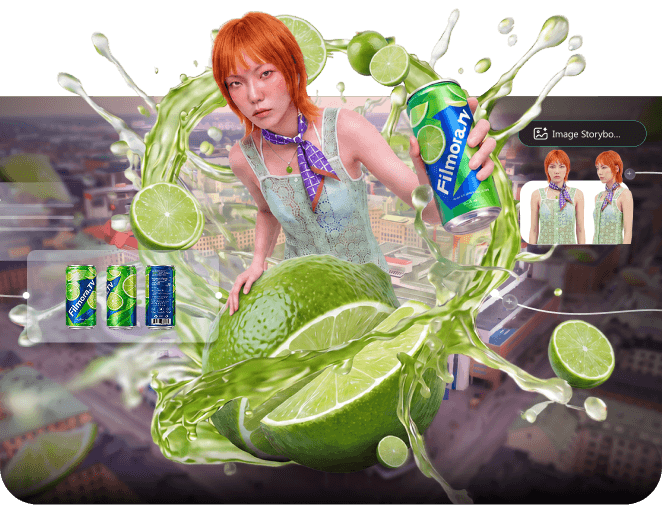
Plan and Create on Visual Canvas
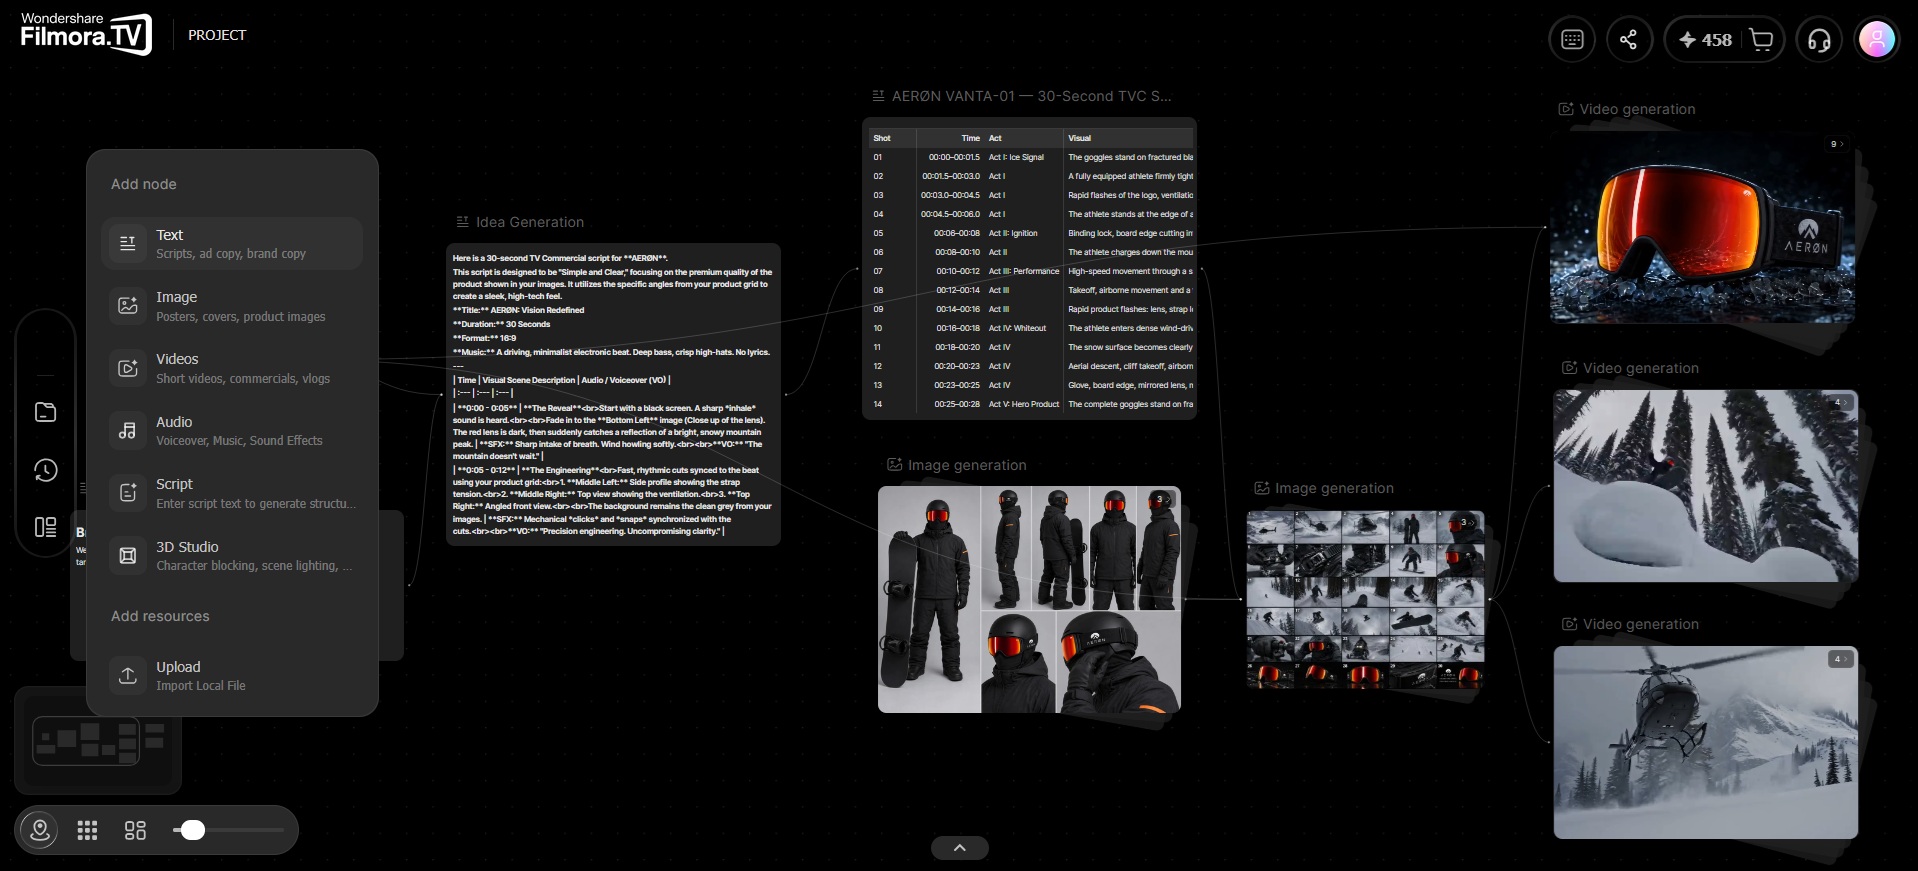
The Visual Canvas is the main workspace in Filmora.TV where you can freely generate and arrange your content on an infinite canvas. You can develop a video concept, write the script, generate reference images, create video variations, and organize selected scenes within the same project using nodes.
Beyond content generation, Filmora.TV includes additional tools to help you create, organize, and refine your project on the canvas, including 3D Studio, Assets Library, History, Timeline Editing, Shortcut Keys, Templates, and Navigation Tools.


Practice each step from this guide directly in Filmora.TV.
In this article
Nodes
Filmora.TV organizes content on the Visual Canvas through nodes. A node is a workspace element that represents a different type of content or task:
- Text Nodes (ad copy, brand copy, script, or production instructions)
- Image Nodes (posters, covers, product shots, character designs, or reference images)
- Video Nodes (short videos, commercials, vlogs, B-roll, etc.)
- Audio Nodes (voiceover, music, sound effects)
- Script Nodes (video scripts, scene descriptions, dialogue, or narration)
You can freely arrange these nodes across the canvas to match the way you develop your project. Just add a node, move it where you want, and connect it to related nodes based on the content, scene, or production step you're working on.
3D Studio
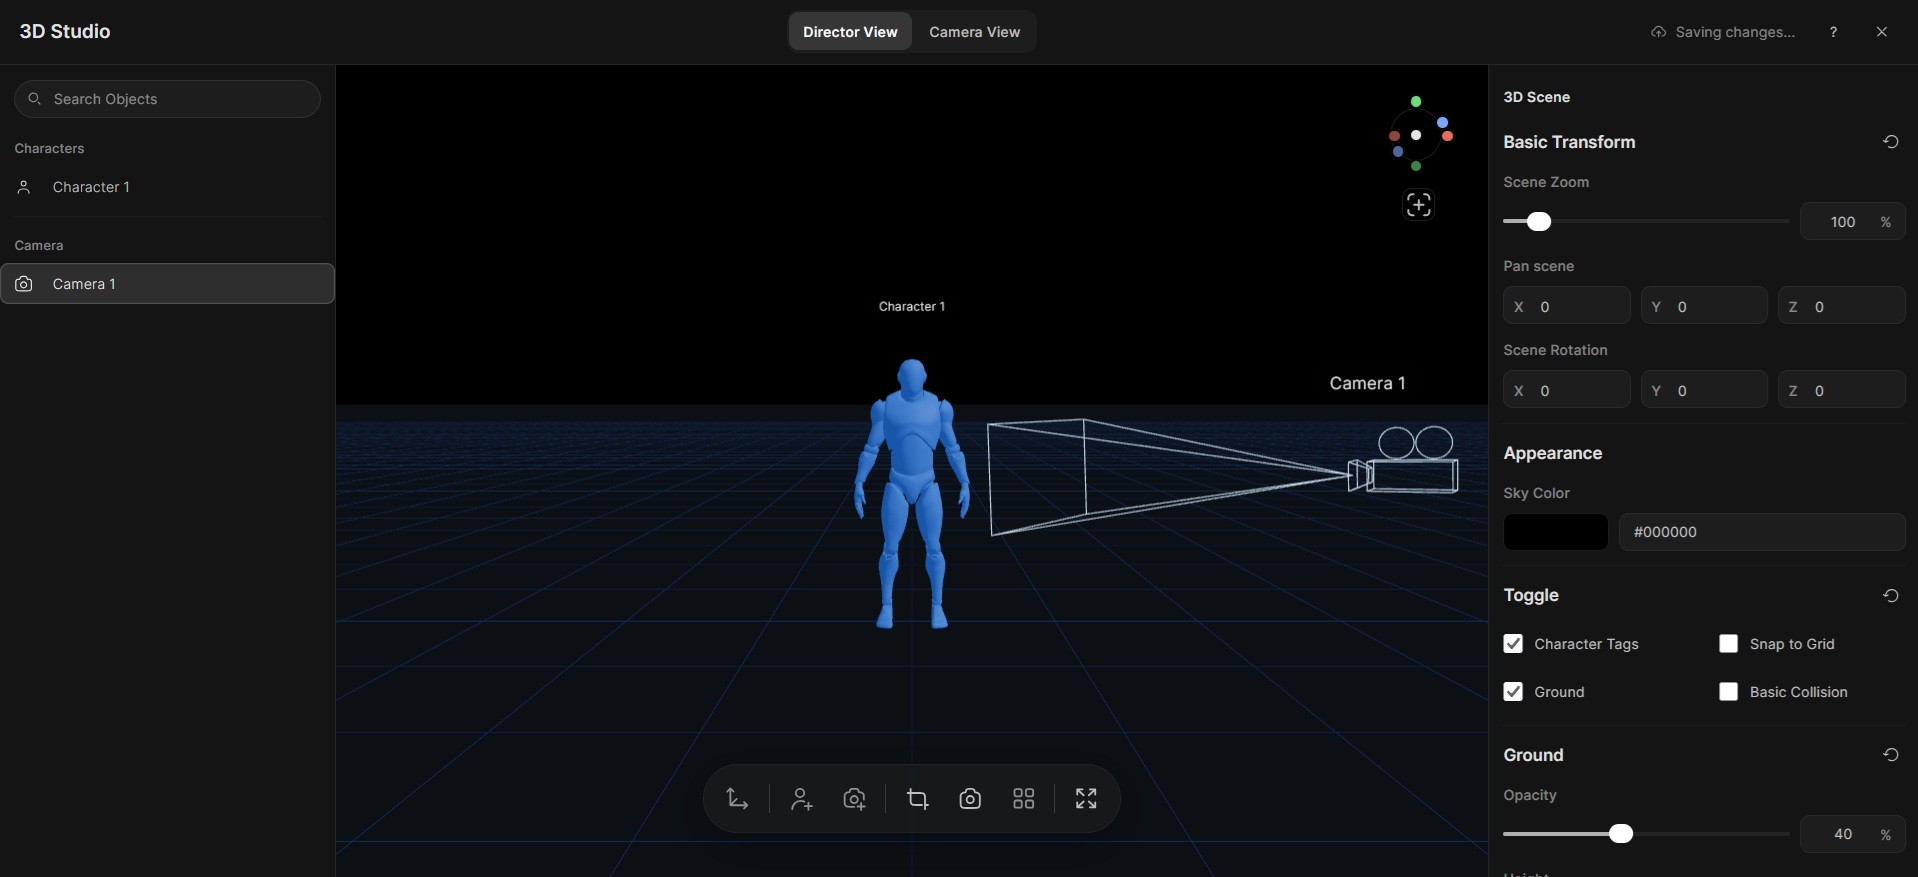
3D Studio in Filmora.TV provides a dedicated workspace for manually setting up 3D scenes and creating visual references for your ideas. You can add and position 3D characters, adjust their size, rotation, and poses, and set up different camera angles to frame your shots.
Once you have the scene and camera angle you want, you can capture the result and apply it to the canvas as a visual reference.
Assets Library
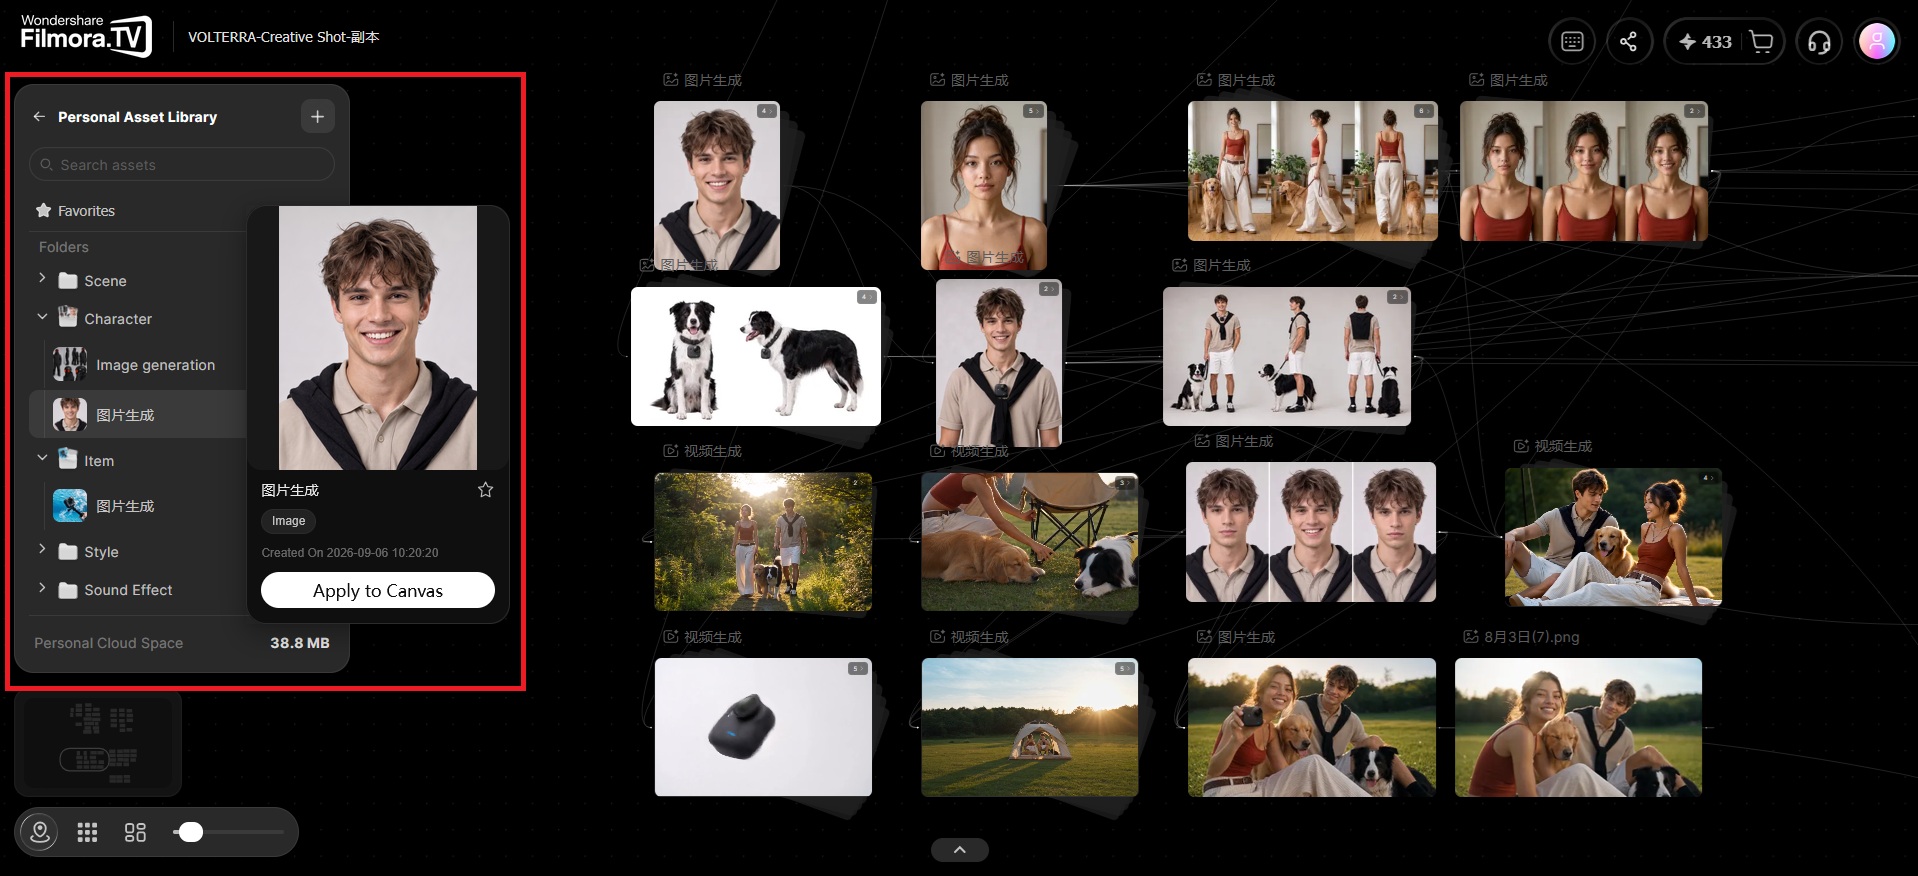
The Assets Library is a folder where you can save and organize project assets for later use. Types of assets you can save in the Assets Library are:
- Scenes
- Characters
- Items and objects
- Visual styles
- Sound effects
- Other reusable creative assets
This feature is particularly useful for maintaining consistency across multiple scenes or videos. For example, you can save a character and reuse it throughout your project as you create new scenes. In team workspaces, the Assets Library also gives everyone a shared place to organize and reuse materials instead of searching for or recreating the same assets each time.
History
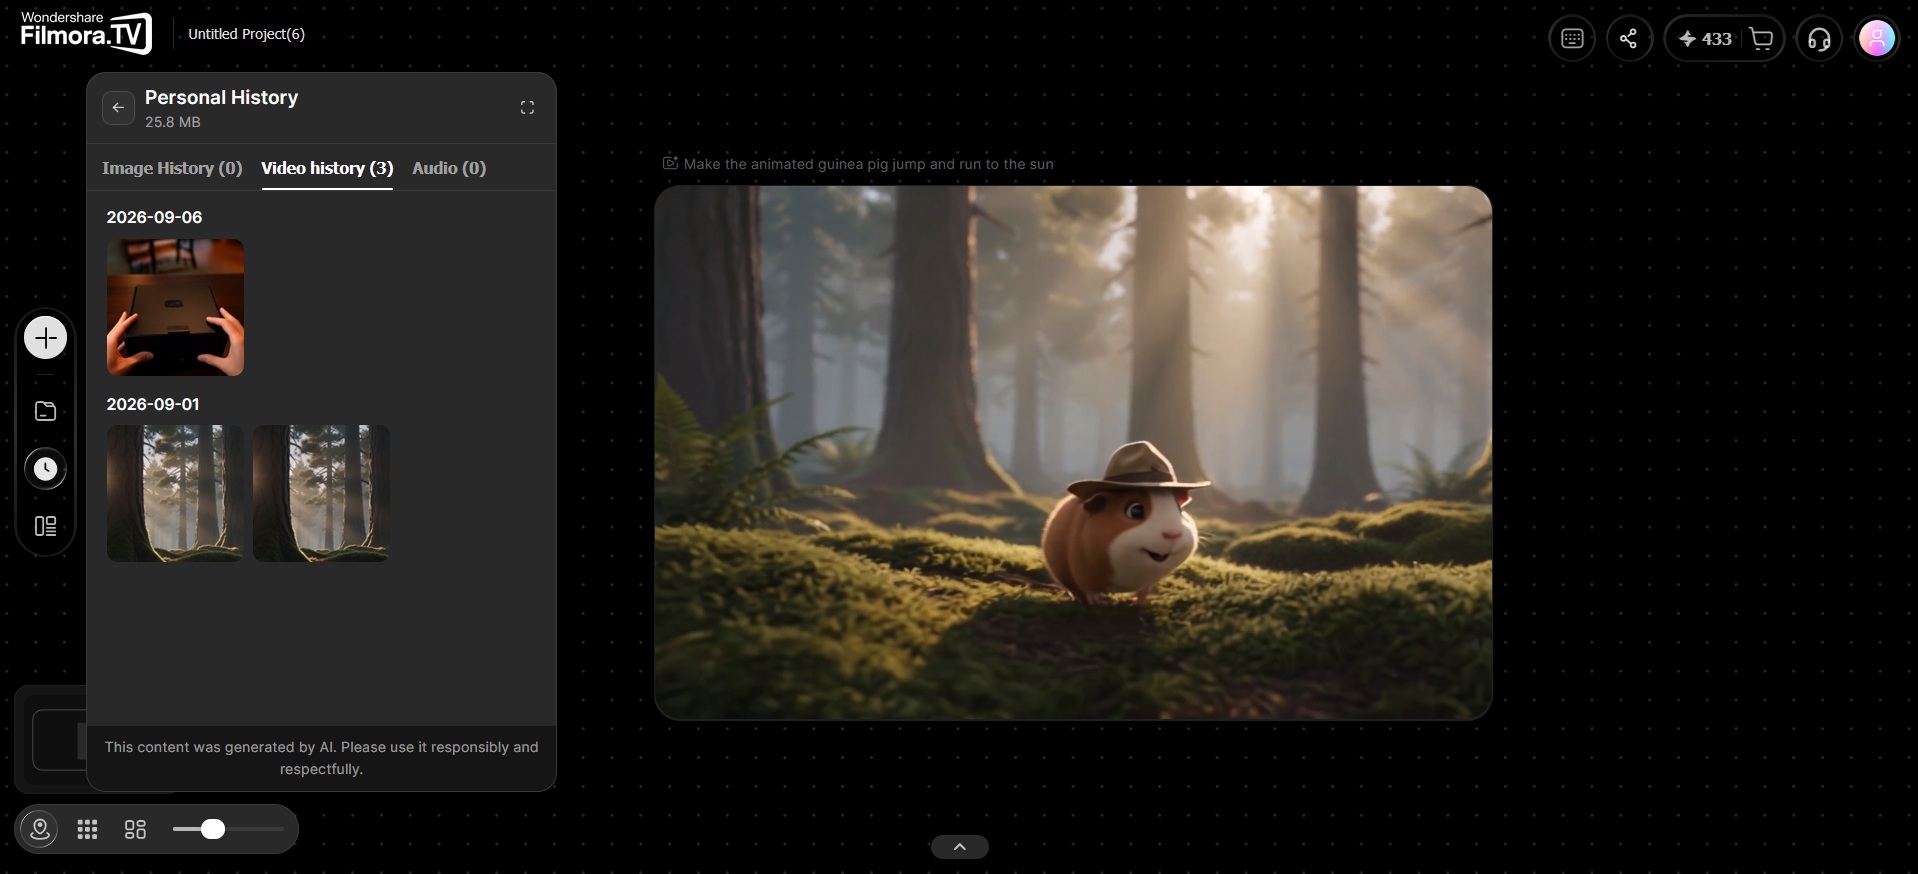
The History feature lets you review previous generations of your work on the canvas. You can access it from the Filmora.TV canvas interface when you need to revisit and reuse earlier versions of your work.
Timeline Editing
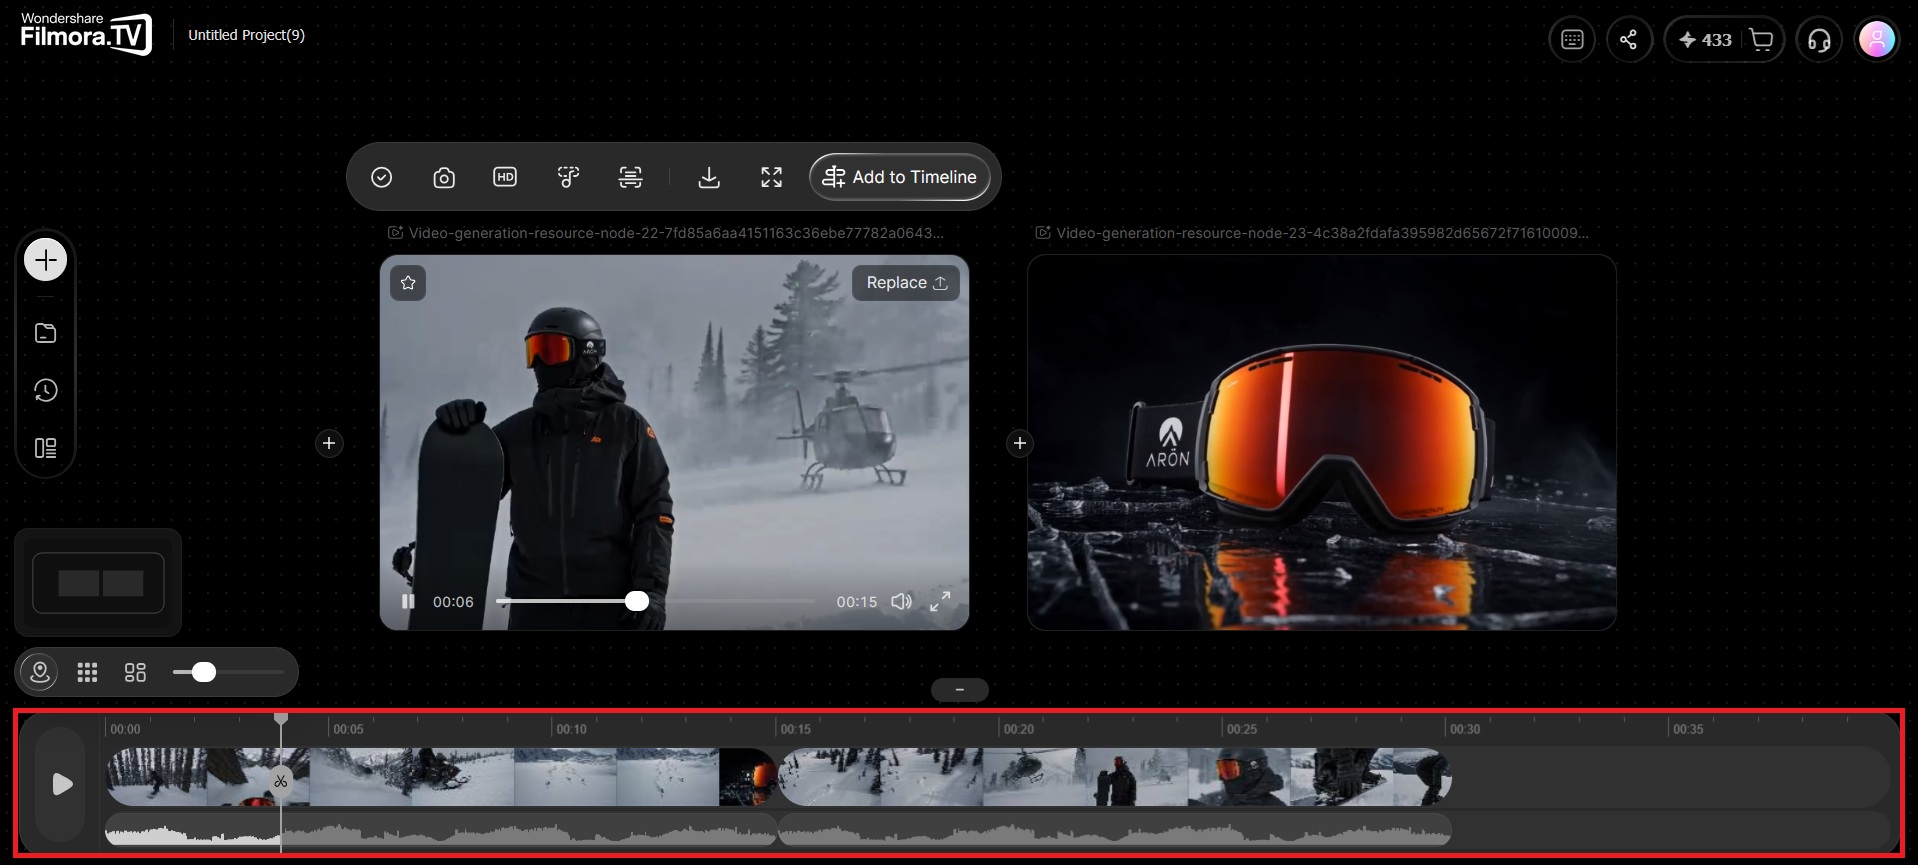
Inside Filmora.TV's canvas, there's a built-in timeline editor where you can arrange your selected clips, add and adjust audio, make edits, and finalize the video. It includes standard editing interactions such as clip trimming, splitting, playback speed adjustment, and magnetic snapping.
You can hide or show the timeline by clicking the "v" icon at the top. To add content from the canvas, click the node and select "Add to Timeline."
Shortcut Keys
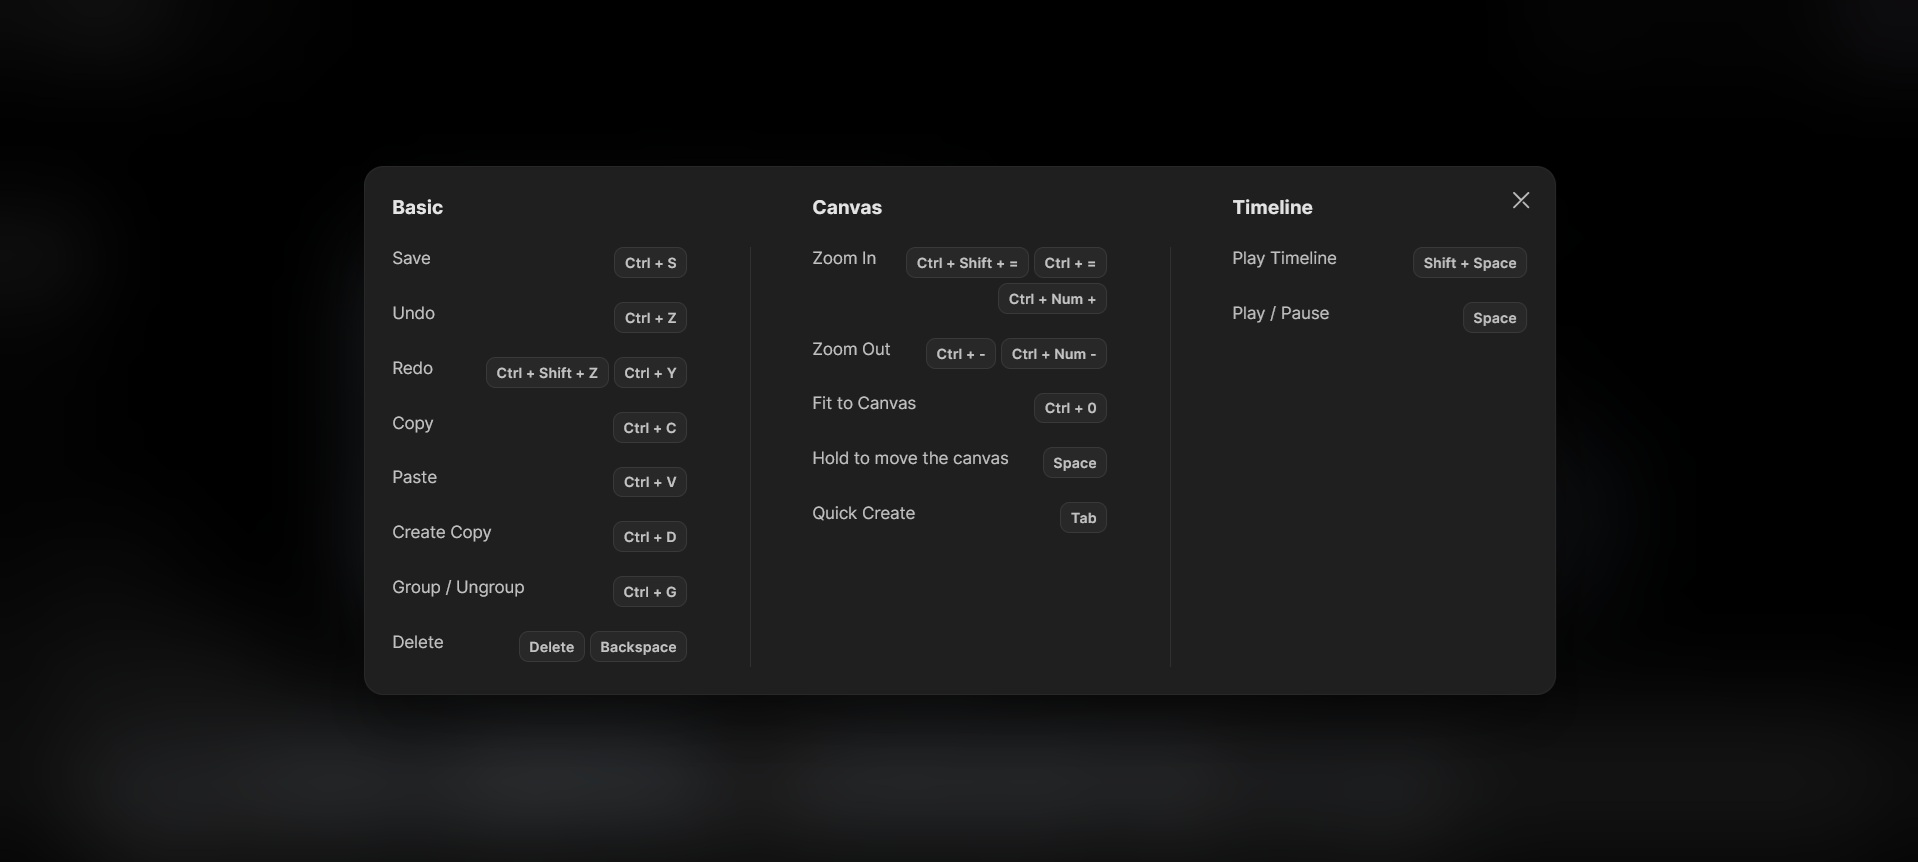
Filmora.TV supports shortcut keys that you can check and use directly on the canvas to perform common actions more quickly while developing and editing your project. You can access the full list by clicking the keyboard icon at the top of the canvas.
Templates
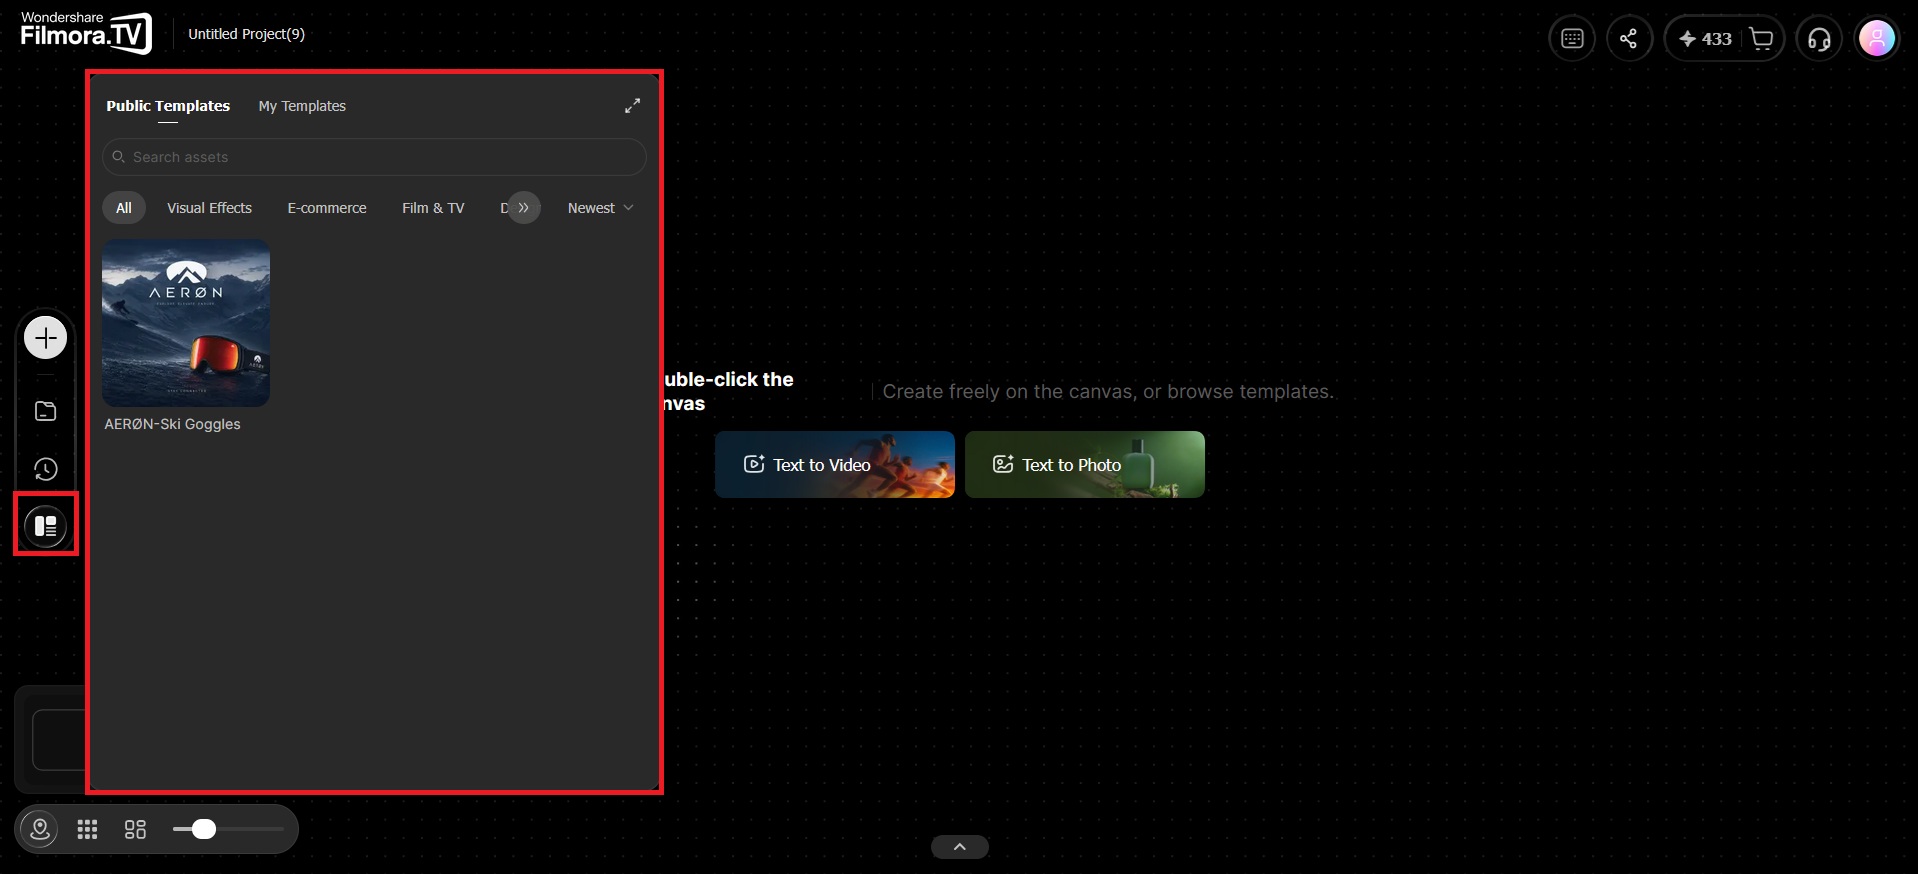
For those who are not sure how to structure their projects, Filmora.TV includes templates that provide a starting point for different types of projects. Each template gives you an existing framework that you can adapt with your own assets and ideas.
Canvas Navigation Tool
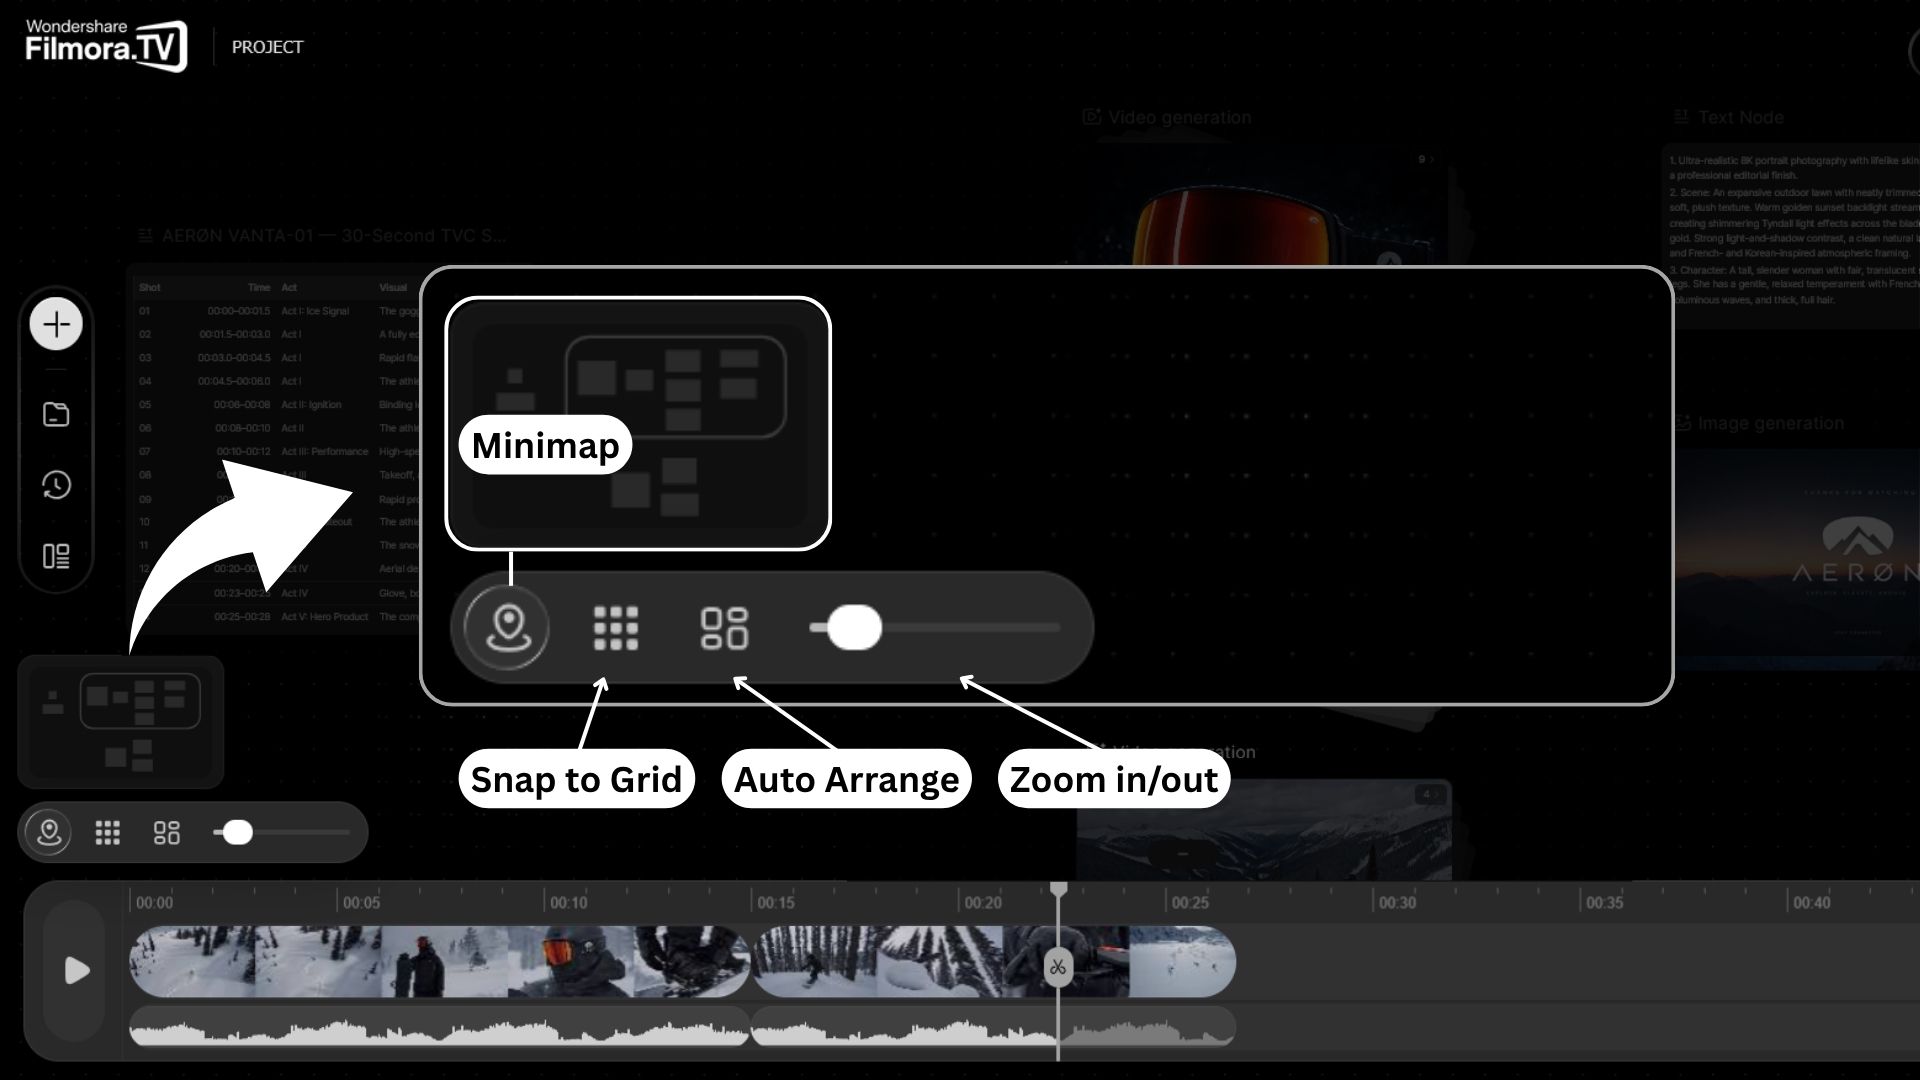
Filmora.TV provides several tools to help you move around and organize the Visual Canvas:
- Minimap: Gives you an overview of your canvas and lets you navigate around it to quickly locate different areas of your project.
- Snap to Grid: Helps keep nodes aligned while you arrange them on the canvas.
- Auto Arrange: Automatically organizes nodes on the canvas and adjusts their positions to create a cleaner, more organized layout.
- Zoom In/Out: Lets you change your view of the canvas by sliding left to zoom out or right to zoom in.
FAQs
-
1. Can I perform local image editing, erasing, cutout, or expansion in the product?
Yes. Filmora.TV supports further editing on an existing image, including image expansion, redraw, erase, cutout, crop, and parsing. You can modify local areas, remove unwanted elements, extract the subject, or expand the image content as needed. -
2. Will replacing an imported image affect the node position or connections?
No. Replacing an image only updates the material inside the current image node. It does not change the node position on the canvas or affect its existing connections with other nodes.
If the original asset is referenced by other video nodes or image nodes, the replacement will automatically refresh those references and update them to the new image asset.
This is useful when you want to quickly replace character images, product images, or scene images while keeping the project structure intact. -
3. Will zooming the canvas affect the final export size or quality?
No. Canvas zoom only affects the preview while editing and does not change the final export size or quality. To keep editing smooth, the canvas preview may be compressed depending on the network and device performance. The export still uses the original media quality and export settings. If you need to check the full result, zoom into the preview window or download it locally.
Was this guide helpful?